 Using Fonts Using Fonts
Generally speaking, fonts come in OpenType, TrueType, PostScript or bitmap form. Of these, the last can be disregarded, since they can’t be scaled without distortion. TrueType, often used by consumers, produces perfectly good results, although PostScript is preferred for desktop publishing (DTP), where easy interchange of fonts is of prime importance.
The Classic Mac OS supports bitmap, TrueType and PostScript fonts, but only the TrueType variety are supplied with the system, since these are adequate for most users. However, if you have a PostScript printer or need to swap material with DTP professionals you may have to install PostScript fonts.
This mechanism, supplied with Mac OS 9.x, allows ATSUI-compatible applications to use other kinds of fonts, such as TrueType .ttf and .ttc fonts for Windows machines and OpenType .otf fonts.
.otf font files. Adobe Type Manager (ATM)
By itself, the Classic Mac OS doesn’t understand PostScript fonts. When such fonts are reproduced on a non-PostScript printer (sometimes erroneously called a QuickDraw printer) or shown on a computer display, the Mac uses the screen fonts supplied with the PostScript fonts, but totally ignores the real fonts. This means that the characters appear at 72 dpi and have jagged edges.
Adobe Type Manager fixes this problem. It extracts the vector information from the PostScript fonts and rasterises this into high-resolution graphics suitable for the Mac’s own QuickDraw mechanism. The computer is then able to reproduce smooth font characters on a non-PostScript device.
To use ATM you must install the ~ATM control panel and select Restart. Opening the panel reveals the following window:-

As you can see, most changes aren’t effective until you’ve selected Restart, including the On and Off switches for ATM.
The remaining settings are as follows:-
This setting can use up a fair amount of RAM, although using more memory can considerably speed up the on-screen display of smoothed fonts.
This pane sets the priorities for ATM: this is usually best left set to Line spacing, as variations in line height can be particularly noticeable on a printed page.
This option uses intermediate colours to blend fonts into the background, a technique known as anti-aliasing. This effect can be tiring on the eyes, although it’s visually pleasing for very large fonts, so you might look to try it with the Disable Smoothing at Screen Font Point Sizes option.
This ensures that each character is spaced accurately along a line of text, although it’s only effective if you’ve selected Fractional Widths in the current application or with Font Control (see below).
This makes it possible to get reasonable results even when the fonts belonging to a document are missing. Typically, this involves the use of Adobe Sans MM and Adobe Serif MM, Courier and Symbol font suitcases as well as their related PostScript font files.
Older Acrobat products, such as Acrobat Reader 2.01 or earlier and Acrobat Exchange, use ATM font substitution for viewing PDF documents. Unfortunately, older versions of the ~ATM panel, as designed for QuickDraw GX, don’t permit font substitution in the GX environment. As a result, such applications put up a message of the form:-
The ATM Font Database must be installed to use Acrobat.
The program will now quit.
Fortunately, later Acrobat products come with built-in font substitution.
This substitution feature requires Multiple Master font files to be installed in your Fonts folder. Such fonts are only supported by ATM Deluxe or ATM Light, versions 4.6.2 or higher.
 Using Classic OS Fonts
A font is usually selected by choosing its name in the Fonts menu of the current application.
In older versions of the Mac OS, and with some PostScript fonts, you can select both the font and a font style in the Fonts menu. The style is shown by the following prefixes to font names:-
| Meaning | Meaning | |||
|---|---|---|---|---|
| B | Bold | L | Light | |
| Bk | Book | N | Narrow | |
| Blk | Black | O | Oblique | |
| C | Condensed | P | Poster | |
| D | Demi | S | Semi | |
| E | Extended | Sl | Slanted | |
| H | Heavy | U | Ultra | |
| I | Italic | X | Extra | |
| K | Kursive |
Having selected a font, you can modify its appearance using the Size and Style menus, as shown below.


You can see in the above example that the 10 point, 12 point and 14 point items in the Size menu appear in an outlined font while the remainder are in plain text. This indicates that a screen font is only available for the 10, 12 and 14 point sizes. If the font in question is a standard bitmap font these sizes look correct while all the others are distorted. However, if ATM is in action and it’s a properly installed PostScript font, every font size will look perfect, both on-screen and when printed, either on a PostScript printer or on a non-PostScript printer.
If you’re using PostScript fonts you’ll usually have separate fonts provided for each style, such as AppleGaramond Bd for bold text, AppleGaramond BdIt for bold italic and so on. Such fonts are carefully crafted to give the best results. Applying any of the styles shown in the Style menu isn’t usually a good idea with these fonts, since the system creates these styles by making rudimentary modifications to the Plain style of the PostScript font. For example, Bold is produced by adding extra pixels to the width of the Plain style whilst Italic is made by leaning the font at an angle.
Some of the more popular TrueType fonts also include additional styled font files for generating optimum results with all selections in the Style menu, although you’ll need to look inside each font suitcase (see below) to confirm if such files are present. However, if these are missing the system again modifies the Plain styles to create other styles in the menu.
Whatever the font, some styles under the Style menu, such as Underline, Outline, Shadow, Condensed and Extended are generated successfully from the Plain font or other standard styles.
 The Fonts Folder
In very old versions of the Classic Mac OS, all resources used by the system, including fonts, are stored in the System file, inside the System Folder. This special kind of file, known as a suitcase, behaves in a similar way to a folder, but is actually a file to which the user can add extra resources.
In later versions of the Mac OS, fonts are kept in the Fonts folder, also inside the System Folder. Contrary to appearances, these fonts also become part of the System file, as in older systems. Such fonts are normally supplied as font suitcases, which are similar to the System file itself, containing all the font files for one or more font families.
Any damaged suitcases should be consigned to the Trash, assuming the system lets you do it. If not, move the Fonts folder to the desktop and drag the unwanted items to the Trash. If this fails, create a new Fonts folder in the System Folder, move all the good suitcases into it, select Restart and then drag the original Fonts folder to the Trash.
Any unwanted suitcases can be temporarily disabled by moving them to another folder, ideally a folder called Fonts (Disabled) in the System Folder, as this naming is used by various utilities, including Symbionts and ExAminer.
 Suitcases
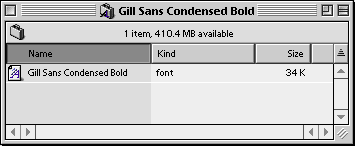
Most Classic Mac OS suitcases contain a single font family, whose name appears in Font menus. And, in most instances, the name of the suitcase is the same as that of the font family. Here’s what you might see inside a modern suitcase:-
Some suitcases contain several font families, as in this example:-
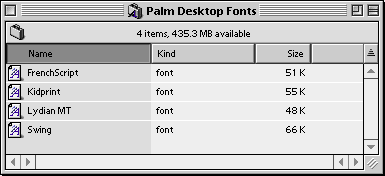
In this instance all the fonts are resizable or scalable, as demonstrated by the ‘multiple letters’ in each font icon. Such scalable fonts are usually in TrueType form.
This following suitcase contains one font family, with TrueType fonts and screen fonts:-

The first font is the TrueType version, again identified by its special icon, while the remainder are screen fonts for 7, 9, 10, 12, 14, 18 and 24-point representation.
€ (Euro currency) symbol.The above suitcase has only one TrueType resource, requiring the system to create other styles by modifying the Plain font. Hence Bold is created by adding 10% to the character width and Italic is made by slanting the characters 11° to the right. The results aren’t always ideal. In fact, much better styles can be obtained by using separate resources, as in this example:-

Some older fonts also use separate style resources for one or more of the screen fonts, as in the Classical font family, which has font files of Classical (bold, italic) 14, Classical (bold, italic) 18, Classical (italic) 14 and Classical (italic) 18.
Last, but not least, here’s a suitcase that only contains screen fonts:-
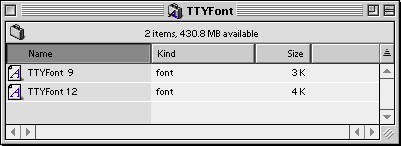
Generally speaking, this kind of font is unsuitable for printing (unless you actually want jagged edges) and produces distorted text with sizes other than those shown, in this instance 9 and 12 point. However, if you don’t mind jagged edges you can use multiples, such as 18 or 24 point.
FONT resources that are susceptible to corruption with Mac OS 8.6, although other versions of the system don’t have this problem. You can fix this with Apple’s own software or you can install the Font Fixer for 8.6 extension. Font Files
All Classic font suitcases contain at least one font file. You can examine the contents of a such a file by simply double-clicking on it, in which case you’ll usually see a window of the following form:-
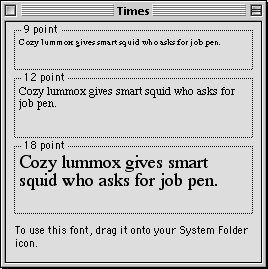
This example is a TrueType font, as indicated by the different sizes of font. If you open a screen font you’ll see a single size font in a window that looks something like this:-

Unfortunately the window give for a dingbat font isn’t always very useful:-

In older software, fonts are identified by a font number, also known as an ID. With older computers this is faster than using names, although confusion occurs when different machines use an alternative ID for the same font. Although modern applications identify fonts by name, the Mac OS still assigns every font a number.The lower numbers, reserved by Apple for their own fonts, are:-
| ID | Font Name |
|---|---|
| 0 | Reserved for system font |
| 1 | Reserved for application font |
| 2 | New York |
| 3 | Geneva |
| 4 | Monaco |
| 8 | San Francisco |
| 13 | Zapf Dingbats |
| 14 | Bookman |
| 15 | N Helvetica Narrow |
| ID | Font Name |
| 16 | Palatino |
| 18 | Zapf Chancery |
| 20 | Times |
| 21 | Helvetica |
| 22 | Courier |
| 23 | Symbol |
| 33 | Avant Garde |
| 34 | New Century Schoolbook |
Most of the remaining numbers are assigned dynamically. So, when you install a font onto a machine where a number is already used the font is given a new and arbitrary ID. Many of the following fonts are commonly encountered, which means they’ll probably have the same ID on your computer.
| ID | Font Name |
|---|---|
| 174 | Futura |
| 258 | ProFont |
| 513 | ISO Latin Nr 1 |
| 514 | PCFont 437 |
| 515 | PCFont 850 |
| 1029 | VT80 Graphics |
| 1030 | 3270 Graphics |
| 1109 | Trebuchet MS |
| 1345 | ProFont |
| 1895 | Nu Sans Regular |
| 2001 | Arial |
| 2002 | Charcoal |
| 2004 | Sand |
| 2005 | Courier New |
| 2006 | Techno |
| 2010 | Times New Roman |
| 2011 | Wingdings |
| 2040 | Skia |
| 2013 | Hoefler Text |
| 2018 | Hoefler Text Ornaments |
| 2039 | Impact |
| 2305 | Textile |
| 2307 | Gadget |
| 2311 | Apple Chancery |
| 2515 | MT Extra |
| 4513 | Comic Sans MS |
| 7092 | Monotype.com |
| 7102 | Andale Mono |
| 7203 | Verdana |
| 9728 | Espi Sans |
| 9729 | Charcoal |
| 9840 | Espy Sans/Copland |
| 9841 | Espi Sans Bold |
| 9842 | Espy Sans Bold/Copland |
| 10840 | Klang MT |
| 10890 | Script MT Bold |
| 10897 | Old English Text MT |
| 10909 | New Berolina MT |
| 10957 | Bodoni MT Ultra Bold |
| 10967 | Arial MT Condensed Light |
| 11103 | Lydian MT |
EFNT resource, which can be modified using Apple’s ResEdit application. System Fonts
Some of the fonts listed above, namely Charcoal, Chicago, Capitals, Gadget, Sand, Techno and Textile, can be chosen as the Large System Font menu in the Appearance control panel, which then appears in menubars and dialogues. These fonts are different to most other fonts in that they contain all the special characters required for use in menubars.
sfn# resource in the System file lists the names of acceptable system fonts.sfn# resource in your System file to use it. Alternatively, you can use a special suitcase with the resources renamed to match one of the accepted fonts.The Small System Font menu in the Appearance control panel is usually set to the Geneva font, although in some version of the Mac OS you can use an application such as FreeGeneva to let you use an alternative font. Fortunately, any font can be selected in the Views Font menu.
 Font Resources
A font family consists of font files in a suitcase with the same basic name. For example, the font files named Garamond, Garamond (bold), Garamond (bold, italic), Garamond (italic), Garamond 10, Garamond 12 and Garamond 14 form the Garamond font family.
The relationship between font files and the Mac OS resources that constitute a family is rather complex. At the highest level there is the font family descriptor resource, identified by the FOND resource code. This provides information about the family, also referring to other resources that define the shape of characters in each style or size of the font.
FOND resource for each family. However, if you drag some of the family’s font files from the suitcase each one contains a copy of the FOND resource.Various resources are used to describe the shape of a font. The oldest kind, known as a FONT, is a bitmap description. The NFNT resource is similar, but allows larger fonts to be reduced in size to obtain greater resolution during printing. Finally, there’s the scalable font resource, identified by the sfnt code, which usually contains a TrueType font.
The name of a font, as seen in Font menus, is set by the name of each FOND resource. Although best avoided, names can be changed by opening a suitcase in ResEdit, selecting the resource for the font, choosing Get Info and entering the new name.
% (percentage sign) are recognised by documents but don’t appear in the Fonts menu. This is useful for fonts only used by special applications or by self-reading documents. So, if you want the Arial font but don’t want it to appear in menus, you can rename it as %Arial. This form of naming is also used for barcode fonts. PostScript Fonts
PostScript is a description language that can define anything from a single font to an entire page of a document. PostScript fonts are the universal standard for desktop publishing (DTP). In fact, the popular Times and Palatino fonts were originally produced in this form.
All PostScript fonts should print perfectly at any size, even though screen fonts may not be present for all sizes. Fortunately, this isn’t a problem if you’ve installed the ATM control panel.
In theory, there are at least three kinds of PostScript fonts:-
The standard version, as used with ATM. This variety of file is locked by an encryption process to prevent modifications and includes hinting information for high resolution printing.
An improved version of the Type 1 font that was never released.
An obsolete version that lacks locking or hinting. Fonts of this form that are smaller than 9-point can look rough on high quality printers.
The way in which PostScript fonts are stored in the Classic Mac OS is rather confusing. Unlike other kinds of fonts, where the font description is contained in a standard font suitcase, each PostScript font is kept in a separate PostScript font file, also known as an outline font file.
Here’s an example the files required in the Fonts folder for a PostScript font:-

As always, there is a single font suitcase that also contains the screen fonts for the entire family. In this instance there are also two PostScript font files, one for the Italic font style and another for the Roman style, the latter being equivalent to the Plain style of a TrueType font.
FOND resource, allowing the PostScript font to be used. You should, however, ensure that you have a version of ATM that works with ATSUI.In the above example you should have both the PostScript font files for Superior Condensed to work. If they’re missing the font appears normally in the Font menus but only works as a bitmap font. Fortunately, if you transfer your document to other DTP users they won’t have any problems. However, if you try to print from your computer you’ll get a 72 dpi bitmap rendition of the font.
If only some of the PostScript font files are missing the computer tries to create the required style from the plain font. For example, it simulates boldface characters by adding 30% to the width of plain characters and oblique characters by slanting each character to the right by 15°.
The first five to eight letters in the name of a PostScript font file are usually the same as the font name that appears in Font menus. This latter is defined inside the matching suitcase, which contains the appropriate screen fonts and often has the same name as the font itself. The initial letters are commonly followed by one of the following suffixes:-
| Meaning | Meaning | |||
|---|---|---|---|---|
| Bd | Bold | Lig | Light | |
| Boo | Book | Lit | Lite | |
| Bla | Black | Med | Medium | |
| Bol | Bold | Nor | Normal | |
| Con | Condensed | Obl | Oblique | |
| Dem | Demi | Reg | Regular | |
| Ext | Extra | Rom | Roman | |
| Hea | Heavy | Sem | Semi | |
| It | Italic | Thi | Thin | |
| Ita | Italic | Tit | Titling | |
| Kur | Kursive | Ult | Ultra |
So, for example, the standard font suitcase for Helvetica is accompanied by PostScript font files with names of Helve, HelveBol, HelveBolObl and HelveObl, incorporating styles of plain, bold, bold oblique and oblique respectively.
All PostScript printers come with permanent fonts in ROM. Although extra fonts can be automatically downloaded to the printer from the Fonts folder during printing, it’s often more efficient to send them beforehand using an appropriate printer utility.
This application, supplied with older versions of the Classic Mac OS, is a useful printer utility. Here’s a list of what it can do with a printer and its attached drive:-
Download selected fonts from the Mac to the printer
Print or view a list of fonts in the printer or printer drive
Copy a specific font from the Mac to the printer drive
Delete a specific font from the printer drive
Backup from one printer drive to another
Backup from the printer drive to diskettes
Remove all TrueType fonts from the printer drive
Initialise the printer drive
The PostScript Options window in Page Setup of the LaserWriter 8 printer driver lets you modify the behaviour of a PostScript printer, as shown below.

This replaces some of the fonts in a document by standard PostScript fonts that are kept in the printer. For example, the ‘city fonts’ of New York, Geneva and Monaco are replaced by PostScript fonts of Times, Helvetica and Courier respectively. This usually gives better printing quality and speeds up printing, since the fonts don’t have to be downloaded to the printer.
This improves the appearance of bitmap fonts but has no effect on PostScript or TrueType characters.
This gives improved reproduction of some images. However, you may get faster printing if you don’t choose this option: in fact, it shouldn’t be necessary if your graphics are already of a high standard.
Selecting this option reduces the size of every page to 98% of the original size, thereby ensuring that the pixels in material created on the basis of a 72 dpi screen resolution are accurately aligned with those generated by a laser printer, which are usually at 300 dpi or a multiple thereof.
Allows any number of fonts to be sent to the printer, although this can slow down printing.
 TrueType GX Fonts
TrueType GX fonts are a variation of the TrueType font format. With GX-compatible applications, such as LightningDraw GX, Poster GX and SimpleText, you can morph or modify the characteristics of such fonts. In addition, GX fonts aren’t limited to simple styles: they incorporate intelligent ligatures and pair kerning and accommodate up to 65,000 different characters.
To use GX fonts you must install QuickDraw GX, which lets you use any combination of TrueType, TrueType GX or enabled PostScript Type 1 fonts (see below).
To use PostScript fonts with QuickDraw GX they must be converted. This enabling process happens automatically during the installation of QuickDraw GX, although you can also enable fonts manually using the Type 1 Enabler (see below). Once enabled, each font suitcase and its PostScript font files are merged into a single suitcase that looks like a TrueType GX font.
This application can be used to manually convert PostScript fonts into GX suitcases. This is essential if you have fonts that weren’t enabled during the installation of QuickDraw GX.
To convert your fonts, select the folder or suitcase containing the required PostScript fonts and then proceed as indicated.
The Classic Mac OS selects fonts according to a set of rules, as described below.
The display on a Mac computer always uses fonts that are contained in the Fonts folder. It works down the following sequence to find a suitable font:-
although more recent versions of the Mac OS appear to use TrueType in preference to a screen font.
During printing the system picks the first font file in the sequence:-
Numerous problems can occur during printing, as detailed below.
This can be caused by:-
The smallest font a printer can reproduce is determined by its resolution, as shown below.
| Resolution | Minimum |
|---|---|
| 72 | 8 or 9 |
| 300 | 5 or 6 |
| 360 | 5 |
Some applications don’t let you change font options prior to printing, such as selecting Fractional Character Widths. This ability is really essential, especially if you’re using a high-resolution printer. Fortunately, you can get such control over printing by using a special utility such as Font Control (Fabrizio Oddone). This particular piece of software is supplied as an FKEY resource that can be added to your System file or launched via a utility such as OtherMenu (James W Walker). You should use Font Control just before printing in any application. The following options are available:-
Fractional Widths: ensures correct character alignment when printing, the opposite to the default for many printers. Although some characters can appear truncated on the screen, this isn’t a problem. However, you don’t need to use Font Control to get fractional widths on an Apple LaserWriter printer.
Font Scaling: stretches a bitmap font if a TrueType or PostScript version isn’t available. If disabled, bitmap fonts appear smaller but remain correctly spaced.
Always use TrueType instead of bitmaps: gives the best print quality, although the some fonts may look odd on the screen. This option is useful in older versions of the Mac OS where the Font Manager defaults to printing with bitmap fonts.
Preserve Glyphs: prevents any distortion of glyphs that might occur as a result of stretching the characters.
Here are some problems that you might encounter:-
If text appears in these fonts, both on the screen and when printed, the document usually needs a font that doesn’t exist in your Fonts folder. You should contact the originator of the document.
This is usually a result of selecting Font Substitution in the LaserWriter 8 driver (see above).
This occurs with some PostScript printers when the styled version of a font, such as italic, is missing from the Fonts folder.
This is often caused by variations between the PostScript font file in your Fonts folder and the equivalent in a PostScript printer. Although the author hasn’t tried it, you can fix this by renaming the offending PostScript font file and and downloading it separately to the printer. For example, if Courier is a problem, you can rename it as Xourier and download it.
This is very common, especially with fonts produced by different foundries. The effects are usually quite subtle, such as slightly different character shapes or spacing.
By definition, fonts that deviate from the standard Mac OS character contain a number of non-standard characters. This is often true with fonts that have been badly converted from the Windows operating system, in which case nearly all the non-ASCII characters are wrong. In addition, some fonts designed as system fonts for older versions of the Classic Mac OS contain special characters for keyboard symbols and other menu items in the place of standard characters. Fortunately, the system fonts supplied with Mac OS 8.5 or higher are entirely standard.
This only usually happens in documents that contain control codes. Such codes should always be removed as they can upset the operation of your software.
This is a common problem with older fonts that are designed for earlier versions of the Mac OS, in which code 219 is assigned to the ‘international currency’ character instead of € (Euro currency). If you use version 8.6 or higher of the LaserWriter printer driver you’ll always get a € wherever Option-Shift-T has been typed, even though the international character is shown on the screen. This also works if you’re using a version of the Symbol font that doesn’t contain the € character.
Using Fonts as Drawing ObjectsMost dingbat fonts include a wide range of useful graphical elements. Unfortunately they’re not so easy to manipulate as normal graphics, which means you can’t rotate or stretch them. However, both PostScript and TrueType fonts are created using vector-based mechanisms, which means that it is possible to use such font characters as vector graphics whose shape can be freely adjusted.
The following methods have been used successfully:-
As an alternative, you can save the original text as a PICT file and then use Insert to place the contents of the PICT file in a new AppleWorks drawing document.
Create an EPSF document as follows:-
Choose File ➡ Print in the menubar. If you get a warning about page margins, adjust these first. In the Print dialogue set Destination to File and choose the following options in the Save as File window, selected from the main popup menu:-
Format: EPS Mac Enhanced Preview
PostScript Level: Level 1 Compatible
Data Format: ASCII
Font Inclusion: None
EPSFs that include fonts can be very large. For example, a 12 KB file containing a single character can expand to over 400 KB if it contains fonts. However, fonts should be included if you want to use the new graphic when the fonts aren’t present in your Fonts folder.
Having completed these steps you can use Insert to place the EPSF into another document.
MacWorld magazine (UK), IDG Communications, 2002
©Ray White 2004.
