A markup language lets you convey extra information, such as text styles or tables, in a standard text file. By using special sequences of characters, known as tags, it’s possible to include a huge amount of formatting information in a file that only contains the 128 standard ASCII characters.
The World Wide Web (WWW) employs several variations of Hypertext Markup Language (HTML), all developed from the Standard Generalised Markup Language (SGML). The latest version, derived from the Extensible Markup Language (XML), is known as Extensible Hypertext Markup Language (XHTML).
Most Web pages incorporate links that refer to other files. At the simplest level, these make your browser display the contents of graphics files, which are then embedded in the text of a page.
A hyperlink is more complex than a standard link, since it can redirect a browser to another page or website. Such a link is activated by clicking on a portion of text, which is usually underlined and shown in blue, or on a graphical element, which is sometimes enclosed by a blue border.
Any text that you click on to enable a hyperlink is called hypertext, while the the link itself is known as a hypertext link. A link that activates any kind of multimedia features in the form of text, graphics, sound or pictures is sometimes referred to as a hypermedia link.
index.htm, although your service provider may ask you to use a different name.Here’s what you might see deep within a simple Web page
<h1>My Web Page</h1>
<p class="special">
This is text with a
As you can see, each tag or element consists of a < (opening angle bracket), followed by text and a > (closing angle bracket). The identity of each element is a single word, shown here in blue. Some tags also contain named attributes, each of which is followed by an attribute value. In this example, the p tag carries a class attribute which has a value of special.
Most elements appear as tag pairs. For example, the <p> tag, which is an opening tag indicating the start of a paragraph, is matched by a corresponding </p> closing tag at the end of the same paragraph. However, special tags that only need to be used once don’t require a separate closing tag. Pages made outside of the XHTML standard use the simple > for all tag endings, whilst older Web documents frequently employ uppercase tag and attribute names.
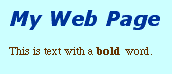
<<This is a special instruction>>. Such tags are known as Overlay tags or Otags.Our example shown above contains h1 (top-level heading), p (paragraph) and b (bold text) tags. When rendered in a Web browser or Web-authoring application it looks like this:-
Finer points, such as the background colour, fonts and font colour are best determined using a stylesheet. This is often a separate stylesheet file, which is tied to the page by a link tag in the head section of the page (see below). In this instance, the stylesheet contains the following lines:-
body{margin-top:15pt;
font-family:"times",
h1{font-family:"verdana",
font-weight:900;
p.special{margin-top:4pt;
which define the attributes, shown in blue text, for the body, h1 and p tags. In our example, the p tag has been given a class of special, allowing you to use other p classes with different attributes.
If we were to view our document without the stylesheet being present or within an older application that doesn’t understand stylesheets we would see this:-

which isn’t a pretty as the original version, although still perfectly acceptable.
The following table shows some of the tags that can be used to modify the appearance of text:-
| Tag | Meaning | Notes |
|---|---|---|
| b | Bold | 'strong' |
| blink | Blinking | Deprecated |
| cite | Citation | Usually |
| code | Computer | Usually |
| em | Emphasised | Usually |
| font | Font | Deprecated; |
| i | Italic | 'em' |
This illustrates some of the problems that can be encountered with HTML. For example, a few of these tags aren’t supported by older browsers or are proprietary tags, which are only recognised by a specific browser application, usually Netscape. In addition, some tags are deprecated in modern versions of HTML, meaning that the same information should be conveyed by means of a stylesheet.
An understanding of how a browser converts raw text into a page can assist you in the creation of Web pages. Let’s have a closer look at our example paragraph:-
<h1>My Web Page</h1>
<p class="special">
This is text with a
The browser recognises the < (opening angle bracket) as the start of a tag and expects it to be followed by a tag name, in this case p. Fortunately, it can easily detect the end of this or any other kind of name by sensing any delimiter that corresponds to a space, " (quote mark), = (equals sign) or > (closing angle bracket): here it sees a space. Now older browsers that don’t understand stylesheets also don’t recognise the class attributes within a tag. Thankfully, this isn’t a problem, since the browser sees the space after the p, thereby recognising the tag, and then ignores everything else until after the >.
This simple but ingenious system ensures that different versions of HTML can be developed without causing serious problems in older browsers.
Our sample paragraph contains tabs, spaces, CR (carriage return) and LF (line feed) characters that improve the readability of the ‘code’, although they don’t mean anything to a browser. All such characters are known as white space characters and can be added or removed without altering the appearance of the page. For example, we could rewrite our paragraph all in a single line, or even as:-
<p class=
"special">
This is text
with a <b>bold</b> word.and get exactly the same result. Note that any extra spaces interposed between the words don’t appear when viewed in a browser, unless you put the text in a pre (pre-formatted) element instead of a p element, or modify the white-space attribute for the matching tag within the appropriate stylesheet.
CR and LF characters have different meanings for different operating systems. However, since they’re ignored by browsers, any Web page can be viewed any kind of computer.<br> tag, representing a line break (with <br /> used in XHTML), effectively takes on the role of the CR and LF characters in a Web page. However, it’s often best avoided, especially if you’ve employed suitable block elements and set their dimensions appropriately in a stylesheet.The people that create and maintain a website are known as a Webmaster. Ask several of them how you should produce Web pages and they’ll all give you different answers. Those who are fussy about the quality of HTML insist that you should create the ‘code’ by hand using a text editor, such as BBEdit. Others, of a less technical disposition, say that it’s easier to use a WYSIWYG Web-authoring application, such as Dreamweaver (Macromedia) or GoLive (Adobe).
In practice, a mixture of both solutions is a good option, since the files produced by a Web-authoring application may need to be ‘fine-tuned’ with a text editor. The author, for example, originally created his material in ClarisWorks 5 and then used an AppleScript script to save the document in HTML (in conjunction with a customised configuration file) and to modify it by means of GREP routines inside BBEdit.
Of course, you can use other applications to manufacture Web pages, such as CyberStudio, Home Page, HoTMetal, PageMill or PageSpinner, some versions of which may be cheaper or rather outdated in comparison with more recent applications. Generally speaking, older software is best avoided, since it often doesn’t provide support for the newer versions of HTML.
Another option is to use special software that ‘prints’ a Web page from any kind of document, such as Myrmidon. In the Classic Mac OS this comes in the form of a Chooser extension, which you must place in the Extensions folder inside your System Folder. The results can be quite good, allowing you to generate pages from any application on your computer.
Lastly, there’s Apple’s .mac service, which lets you create pages very easily. However, unless you’ve already got a domain name in the form of http://www.my_company.com, your site will be given a clumsy address, such as http://homepage.mac.com. Fortunately, it provides email addresses in the much more readable form of my_name@mac.com.
HTML is derived from SGML, and comes in several varieties, the latest being developed from XML and known as XHTML. These various forms of HTML can cause browsers and Web-authoring applications to interpret pages in slightly varying ways, although most are tolerant of oddities in ‘code’ created by errant software or wayward Web designers. Having said this, the more your pages diverge from established standards, the more likely you are to get differences in rendering.
The effect of tags within a Web page can be adjusted by using a Cascading Style Sheet (CSS), more commonly known as a stylesheet. The style information can be embedded into the page itself, although it’s far more flexible to use a separate stylesheet file, which can define the appearance of several Web pages, or even an entire website. Each stylesheet can set the font, font size, font colour, leading, justification, margins, indents and spacing of text, as well as the positioning of graphics.
font tag. Other tags, such as small and big, are perfectly acceptable.There are several differences in the way that Windows machines and Mac OS computers display information. For example, the Mac OS uses a corrected gamma setting of 1.8 whilst a Windows machine employs a gamma setting of 2.2. This means that images created on a Mac can look dark when viewed under Windows. To avoid this problem you can adjust the computer’s monitor settings or use other software to switch between the different gamma settings.
In addition, the default screen resolution of the Mac OS is based on 72 dpi, whilst that used in the Windows operating system is 96 dpi. This means that the text in some Web pages appears larger in the Mac OS by a factor of 96⁄72. Fortunately, such problems can often be avoided by using absolute dimensions in the appropriate stylesheets, such as inches or points, instead of pixels.Colour
Although modern computers and browsers often support millions of shades of colour, some are limited to only 256 tones, of which 216 can be conveyed via a Web page. These are known as Web-safe colours, since they give good results on all systems. Having said this, other shades can still be produced by means of dither, where pixels made of the limited shades are alternated. Unfortunately, although effective, it’s not attractive, since the differently coloured pixels remain clearly visible.
The colours used for elements in a Web page are commonly expressed in long hex colour notation. For example, the colour white is indicated by the code #ffffff, the # (hash) at the start indicating the use of hex. Web-safe colours, which have paired hex digits, can also be entered in short hex colour notation. Hence the colour white is entered as #fff and #663300 as #630.
Finally, some colours can also be entered by name, as in white, red or black. At the time of writing, the official HTML standard recognises only sixteen Windows VGA shades, namely black, silver, gray, white, maroon, red, purple, fuchsia, green, lime, olive, yellow, navy, blue, teal and aqua. However, some browsers recognise many more, as you can see by clicking on the links below. When you’ve finished looking, just press your browser’s Back button to return to this page.
Web pages can be kept on any kind of computer. However, when stored on a Classic Mac OS machine, their behaviour is set by the type code and creator code of each file. Since HTML files contain text they must have a type code of TEXT, while accompanying images should have a type code of BINA, GIFf, JPEG or PNGf, depending on the kind of graphic file.
BINA. Some Classic browsers, on encountering such a file, try to extract a MIME header from the start of the file. However, since this doesn’t exist, the browser carries on, but fails to show the very beginning of the document.The creator code of a Web page file determines which browser is used when you double-click on it. For example, a code of MSIE is used for Internet Explorer and MOSS for Netscape. However, if you want your machine’s default browser to open the file you can remove the creator code altogether using a utility such as FileTyper, although other utilities don’t let you do this.
Linked files that are used in a Web page are addressed by means of a reference. If such file is in the same folder as the Web page itself you can simply call up the file by its filename as in:-
or you can use a relative reference, such as:-
where ../ indicates that the file is in the folder that encloses the Web page. Similarly, if the file is contained at a level two folders up you can use:-
If, however, there’s any risk of confusion, you can use an absolute reference, also known as a Uniform Resource Locator (URL), as in:-
Here are a few other rules that can keep you out of trouble:-
_ (underscore) in filenames.Most operating systems ignore the case of filenames, although the Unix platform does make such a distinction. Some Web servers (see below), presumably Unix-based, are also sensitive to case.
There are numerous publications about Web pages. So, rather than re-inventing the wheel, the remainder of this document looks at the basic components of HTML and a few special topics.
Here’s an example of a simple Web page, as seen from within a text-editing application or inside the Source window in an Web-authoring application or browser:-
<!DOCTYPE html PUBLIC
"http://www.w3.org/TR/2000/
<html xmlns="http://
<head>
<meta http-equiv=
<title>Web Page Window
<link rel="stylesheet"
</head>
<body>
<h1>My Web Page</h1>
<p class="special">
This is text with a
</p>
</body>
</html>The above page, when rendered by a Web browser or Web-authoring application appears in a window entitled Web Page Window. Note that the special tags, such as the meta and link elements in the above example are ‘closed’ according to XHTML conventions using a space followed by >.The following sections look at the various parts of a page in more detail.
Although not necessary for the working of a Web page, all documents should have a DOCTYPE declaration. In fact, this line is essential if you intend to put your Web page through a validation test to ensure the quality of your HTML ‘coding’.
The following declarations can be used:-
Documents using this newest form of HTML should start with:-
Ideally this should be followed by:-
where the first pair of characters indicate the language code, in this instance English, and the second pair the actual country, in this case Great Britain.
Documents that conform to the strict version of XHTML 1.0 should begin with:-
<!DOCTYPE html PUBLIC
"http://www.w3.org/TR/2000/
The transitional version of XHTML 1.0 keeps some of the tags from the older HTML 3.2 standard, thereby ensuring good compatibility with an older Level 3 browser, such as Internet Explorer 3.x or Netscape 3.x. This uses a declaration of:-
<!DOCTYPE html PUBLIC
Finally there’s the frameset version, which is best avoided, if at all possible:-
<!DOCTYPE html PUBLIC
Some XHTML 1.0 pages begin with something like:-
instead of or prior to the DOCTYPE line. Unfortunately, some browsers object to this, so it’s best omitted. Instead, you should include the following meta tag (see below) in the head of the file:-
Again, there are three kinds of documents that conform to the HTML 4.01 standard:-
<!DOCTYPE HTML PUBLIC
<!DOCTYPE HTML PUBLIC
<!DOCTYPE HTML PUBLIC
Once again, there are three kinds of documents conforming to the HTML 4.0 standard:-
<!DOCTYPE HTML PUBLIC
<!DOCTYPE HTML PUBLIC
<!DOCTYPE HTML PUBLIC
The original HTML 3.2 standard is employed only in old documents and uses this declaration:-
<!DOCTYPE HTML PUBLIC
while the earlier compact form of HTML 2.0 uses:-
The html section of our example page looks like this:-
<html xmlns="http://
<head>
<meta http-equiv=
<title>Web Page Window
<link rel="stylesheet"
</head>
<body>
<h1>My Web Page</h1>
<p class="special">
This is text with a
</p>
</body>
</html>As you can see, it contains nearly all of the page, except for the DOCTYPE declaration. Most browsers are happy to work without these tags being present, although it’s not advisable to leave them out. In the case of XHTML documents the html opening tag should always be:-
XHTML 1.1 or higher doesn’t allow the lang attribute, which appears as lang="en" at the end of top line in the above example. Instead it determines the language from the xml:lang attribute.
This section of our sample page looks like this:-
<head>
<meta http-equiv=
<title>Web Page Window
<link rel="stylesheet"
</head>
none of which is seen inside the window of a browser, apart from the window name.
One of the most important things to be found inside the head element are meta tags, which convey extra information about the Web page. Any number of these tags can used, all in the following form:-
<meta *****>
<meta *****>The most common kinds of meta tags are described below. Optional attributes are shown inside square brackets, as in [URL=url], although the actual brackets shouldn’t be entered and the values in red must be replaced by your own choices.
<meta http-equiv="content-language" content="language" >
Indicates the language of a page, such as french or english, which is to be used by search engines. Under normal circumstances this should match the lang parameter contained in the parent html tag.
<meta http-equiv="content-type" content="mime_type; [charset=charset]">
Lets you use an alternative MIME type or character set, allowing you to use characters not encoded as entities in the document. Usually set to content="text/html; charset=ISO-8859-1".
<meta http-equiv="expires" content="day, date year
Using this tag prevents some search engines from including the page after the specified data and time. The latter must be specified in the form of Fri, 08 Feb 2003 14:23:00 GMT.
<meta http-equiv="refresh" content="n; [URL=url]">
This header causes the page, or an alternative page specified by the chosen URL, to be reloaded every n seconds: this feature is sometimes used in a ‘welcome’ page. Older browsers don’t support this tag, so you should also provide a standard link to the required page. If required, you can set n to 0, effectively using the meta tag to redirect a blank page to the given URL. In this instance you can usually omit DOCTYPE, html and body elements to improve speed, although some delay is inevitable.
<meta http-equiv="text" content="text">
This supplements or replaces the normal header used by an HTTP Web server.
<meta name="author" content="name" >
Lets you confirm the name of the document’s author.
<meta name="keywords" content="word_1,word_2…" >
Provides search engines with searchable keywords for the page, such as cats, dogs. If you can, try to use as many keywords as possible.
<meta name="description" content="description_text">
Provides a short description of the page, as used by search engines.
<meta name="copyright" content="copyright_text">
Gives a short copyright description of the text, such as (c) Fred Bloggs 2003.
<meta name="distribution" content="global/local">
Indicates if the page is a ‘global’ index page or simply a local document. This tag appears outdated.
<meta name="robots" content="none/nofollow
This tag tells search engines which pages to index. Using none prevents indexing, nofollow causes only the current page to be indexed, all causes the current and linked pages to be indexed and noindex only permits indexing of linked pages.
<meta name="generator" content="your_text">
Programs that generate HTML often automatically add this tag to each page, effectively advertising their product. This is usually of little benefit to the page itself.
<meta name="your_meta_name" content="your_text">
This accommodates special tags: those not understood by a browser are simply ignored.
In our example page shown above we have the line:-
which identifies the required stylesheet file. Any number of other link tags can also be included inside the head area, such as:-
where the rel attribute indicates that the page is related to the file index.htm, in this case an index used for this and other documents. You can also have a rev or reverse relationship, as in:-
which indicates that the file containing this link is a subsection of the file called main_file.htm. All sorts of values are used for rel and rev attributes: where more than one attribute is required you can use a list of values separated by spaces. The most common values are Index, Next and Previous, although more recent additions include contents, prefetch, required and redirect.
This part of our example page looks like this:-
<body>
<h1>My Web Page</h1>
<p class="special">
This is text with a
</p>
</body>
This section is the only part of the page that conveys information that’s visible to the user. The h1 element, used for a ‘top-level’ heading, and the p element, are both known as block elements, since they create free-standing items on the page. The b element, on the other hand, simply modifies the text, being part of a group known as inline, phrase or font-style elements.XHTML
The Extensible Markup Language (XML) is based on the Standardised General Markup Language(SGML), which is also the basis of HTML. However, unlike HTML, where you’re limited to standardised tags, XML lets you define your own tags in a Document Type Definition (DTD) stored at the start of each file or in a separate document. This allows data to be exchanged between different applications and computer platforms, but with each document tailored to a specific task.
XHTML is a variation of XML, now overtaken by HTML 5, that incorporates features found in older versions of HTML. Unlike XML, the current version doesn’t let you define tags, which means it’s compatible with older browsers. However, to comply with the standards of XML you must observe the following rules:-
> to ensure compatibility with older browsers.The WWW Consortium (W3C) has produced a useful tool known as Tidy. This converts tags in older Web pages to lowercase and adds quote marks to attribute values.
This is a tricky area, since different users and different computer platforms employ different fonts. Many Webmasters neatly avoid the problem by not specifying any fonts by name. Instead, they rely on the recipient’s computer to use its default fonts, which are usually split into the following types:-
| Font | Example |
|---|---|
| Proportional | Times |
| Sans-serif | Trebuchet |
| Serif | Times |
| Monospace | Monaco |
| Cursive | Script |
| Fantasy | Old |
Changing the size and style of these fonts gives some variation in presentation. However, most site designers want their pages to look exactly as they intended. Fortunately, there are several fonts that are frequently used across different platforms. The commonest examples include Arial, Courier, Courier New, Times, Times New Roman, Trebuchet MS and Verdana, although Georgia and Comic Sans MS are also widely used. Other well-established fonts, such as Arial, Arial Black, Impact, Monotype Sorts, Webdings and Wingdings are also employed on many Web sites.
This section looks at a few selected items of special interest.
An anchor is a location within a Web page that can be reached from a link on another page, or even the same page. The distinction between anchors and links can seem confusing, as both can be found in an a (anchor) tag. However, a true anchor is best created by adding an id to other tags, as in:-
which can be reached from within the same document by using a link of the form:-
where Go to Top of Section is the text contained in the link. Note that the id, which must begin with a letter, is prefixed at the link by the # (hash) character. To reach a different page you could use:-
where target_file.htm is the required document and top_of_section is the anchor within it. If you don’t need to move to a particular anchor in the file you can use something of the form:-
Links of this kind can also include rel and rev attributes, as described above:-
Anchors can also be placed around items of text, as in:-
although this is more cumbersome than using anchors inside other tags. Older HTML files often employ the name attribute instead of id. This older term works in a similar way to id but isn’t permitted in XHMTL 1.1 or higher. It also can’t be used inside anything other than an a tag.
Frames can be used to divide a window into compartments, one of which usually changes when you click on a link in another section. Unfortunately, this mechanism, originally introduced in the Netscape Web browser, is considered to be flawed, and should be avoided if at all possible.
You can use frames to create a window that has a sidebar to the left and the main text to the right. First, you must create an HTML frameset document containing something like this:-
<!DOCTYPE html PUBLIC
"http://www.w3.org/TR/2000/
<html xmlns="http://
<head>
<title>My Web Page
<base href="http://
</head>
<frameset cols="150,*">
<noframes>
<body>
This page requires a
browser that supports
</body>
</noframes>
<frame src="sidebar.htm"
<frame src="main.htm"
</frameset>
</html>Note that this document begins with a DOCTYPE declaration that includes the necessary frameset phrases. The optional base tag specifies a ‘base’ location for the URLs of all your documents, while the frameset element effectively replaces the body tags found in a standard HTML file. The latter includes a cols attribute that indicates that the leftmost frame for the sidebar is 150 pixels wide and that the rightmost frame for the main text has an unspecified width.
The document also has a noframes section for those browsers that don’t support frames. This has standard body tags and some text, all other content being ignored by such a browser.
The sidebar.htm file must have a body that contains something like:-
<a href="page_1.htm"
In this instance the target attribute refers to the main window by the name mainframe, as used in the frameset document, thereby ensuring that the selected material appears in the main frame. Of course, other names can be used for target attributes, although the following have special meanings:-
| Value | Renders |
|---|---|
| _blank | new |
| _self | window |
| _parent | immediate |
| _top | entire |
The use of target can be avoided by including the following inside the head of the document:-
although this can also be overridden by using _self for any target attribute.
A list is ideal for creating a table of contents in a Web page. The simplest kind of list is an unordered list, as shown below:-
<ul>
<li>Item1</li>
<li>Item2</li>
</ul>which gives the result:-
Items in this kind of list can also be nested, as in this instance:-
<ul>
<li>Item 1</li>
<li>Item 2
<ul>
<li>Sub Entry 1</li>
<li>Sub Entry 2</li>
</ul>
</li>
</ul>which is rendered as:-
Alternatively, you can use an ordered list, as in:-
<ol>
<li>item1</li>
<li>item2</li>
</ol>which usually gives a numbered result, as shown here:-
Finally, you can use a definition list as follows:-
<dl>
<dt>Item 1</dt>
<dd>1 Sub Entry</dd>
<dt>Item 2</dt>
<dd>2 Sub Entry</dd>
</dl>which is rendered as:-
Note that definition lists can also include unordered or ordered lists.
A typical table is comprised of table, th (table header), tr (table row) and td (table data cell) elements, all nested one within another. If you intend to edit this kind of material in a text application you’ll need to format the text, otherwise you’ll get confused. Here’s a simple example:-
<table width="80" border="1"
<tr valign="top">
<th align="center"
Heading
</th>
</tr>
<tr valign="top">
<td>
Item 1
</td>
<td>
Item 2
</td>
</tr>
</table>which is rendered as:-

although a more attractive result could be obtained by using a stylesheet to replace some or all of the attributes in the Web page itself, or to adjust other features, such as the borders and background colour of the table, as well as the colours, fonts and character styles of the text.
If you remove the Item 1 text you may suffer from a shrinking cell, as illustrated here:-

although this doesn’t always happen if there are other columns containing sufficient text. You can overcome this by filling the ‘empty’ cell with enough non-breaking spaces to increase its width, as in:-
or you can use an image of the required cell width, as in:-
Any unwanted spaces in tables can be avoided by using the valign attribute in the tr tag, as in:-
<table width ="360"
<tr valign="bottom">
<tr valign="top"></tr>
or, better still, by employing a suitable stylesheet.
Making a navigation bar isn’t very difficult. For example, the following lines:-
<table width="320"
<tr valign="top">
<td><a href=
<td><a href=
<td><a href=
</tr>
<tr valign="top">
<td><a href=
<td><a href=
<td><a href=
</tr>
</table>are rendered as:-
However, this simplicity is only made possible by using a stylesheet containing:-
body{background:#ffe4b5;}
table{margin-top:12pt;
td{text-align:center;
If necessary, you can use different classes for different kind of tables and table elements of this kind.
The careful use of stylesheets ensures that most pages look much the same on all browsers. However, small adjustments in the position of text and images, especially with older forms of HTML that don’t support stylesheets, can also be made using a special GIF file known as a transparent pixel. As the name implies, this has a height and width of one pixel and is transparent. However, it can also be scaled to a any size, as shown in the following example:-
<img src="pxl.gif"
where the transparent pixel contained in pxl.gif has been made wider, pushing the graphic.gif image 20 pixels to the right. Similarly, you can push the image downwards, as in this example:-
<img src="pxl.gif"
<br>
<img src="graphic.gif"Note that this requires a <br> tag to make it work, which isn’t usually a good idea. It’s been suggested that you can use a single transparent pixel stretched in both directions to move an image both downwards and to the right. In practice, however, you’ll need to use the pixel twice, as shown here:-
<img src="pxl.gif" alt=""
<br>
<img src="pxl.gif" alt=""
Having created the Web pages for your website you can do one of two things: you can upload all of the necessary files to a Web server provided by your Internet Service Provider (ISP), or you can create your own Web server. Most people prefer the former option, since it requires less effort, although some restrictions are inevitable. For example, your ISP may not accommodate the Common Gateway Interface (CGI) scripts or other special software that you’d like use.
Before uploading your pages to a server you should consult the instructions provided by your ISP. A typical website incorporates a public_html folder for your pages, as well as a cgi-bin folder for any CGI scripts, although the available folders vary between ISPs.
You also need to know your ISP’s preferred name for your ‘home page’, which is usually default.html, index.html, home.html or main.html. You can use an alternative, although this makes it more difficult to get to your location. For example, if your website is at www.my_site_name and you use default.htm for the name of your home page, as instructed by your ISP, then a visitor can reach the site by using the address www.my_site_name/, with or without the / at the end of the URL. However, if you change the home page to start.htm access can only be obtained by entering www.my_site_name/start.htm.
The uploading process is usually straightforward, involving the use of File Transfer Protocol (FTP), which is supported by most Web-authoring applications. Failing this, you can use a special FTP application such as Fetch. Such software employs an FTP address of the following form:-
where user_name and password are replaced by your own values while ftp_host_name is often entered automatically by your application. The final part, your_domain, is replaced by the URL of the website, as provided by your ISP. In some instances this ends in .com/, in common with most Web sites, although some providers require you to use a .net/ ending, even though your own Web address doesn’t have this kind of suffix. If you enter the address without a password, as in:-
you’ll be prompted to enter your password manually. In addition, you must of course select the folder containing your pages and wait for the uploading to complete. Once this is done, you can check the behaviour of your site using a normal Web browser.
If you need to use your own server it must be installed on a machine that’s permanently connected to the Internet. This means that the computer must be constantly powered and wired to the Internet via an ISDN or ADSL connection. To run the server itself, your ISP must provide you with a static ISP address, also known as an unchanging address, although not all ISPs support this option.
The simplest way to create a server is by using Personal Web Sharing, which is built into recent versions of the Mac OS. In the Classic Mac OS this consists of the Web Sharing Extension file and a Web Sharing control panel: both of these must be installed in the appropriate locations in your System Folder. If PWS require extra memory space you should adjust the memory allocated to the Web Sharing Extension, which is really a background application, and then restart your computer.
Larger server computers use various operating systems, including Unix, Windows NT or Mac OS X Server. Common Mac OS server software includes WebStar (which is also built into Mac OS X), WebTen and Quid Pro Quo Plus. Naturally, all of these applications support HTTP, as required for Web operation. However, some software also accommodates FTP, allowing visitors to your site to transfer files without you having to provide separate FTP server software.
Some server applications support the Secure Sockets Layer (SSL) for extra security, allowing credit card details to be scrambled. Most accommodate Server Side Includes (SSIs), while others also support the Apache Extended SSI (XSSI) standard. Such mechanisms provide extra features for your website, such as a display of the current date and time in browser windows.
©Ray White 2004, 2021.
